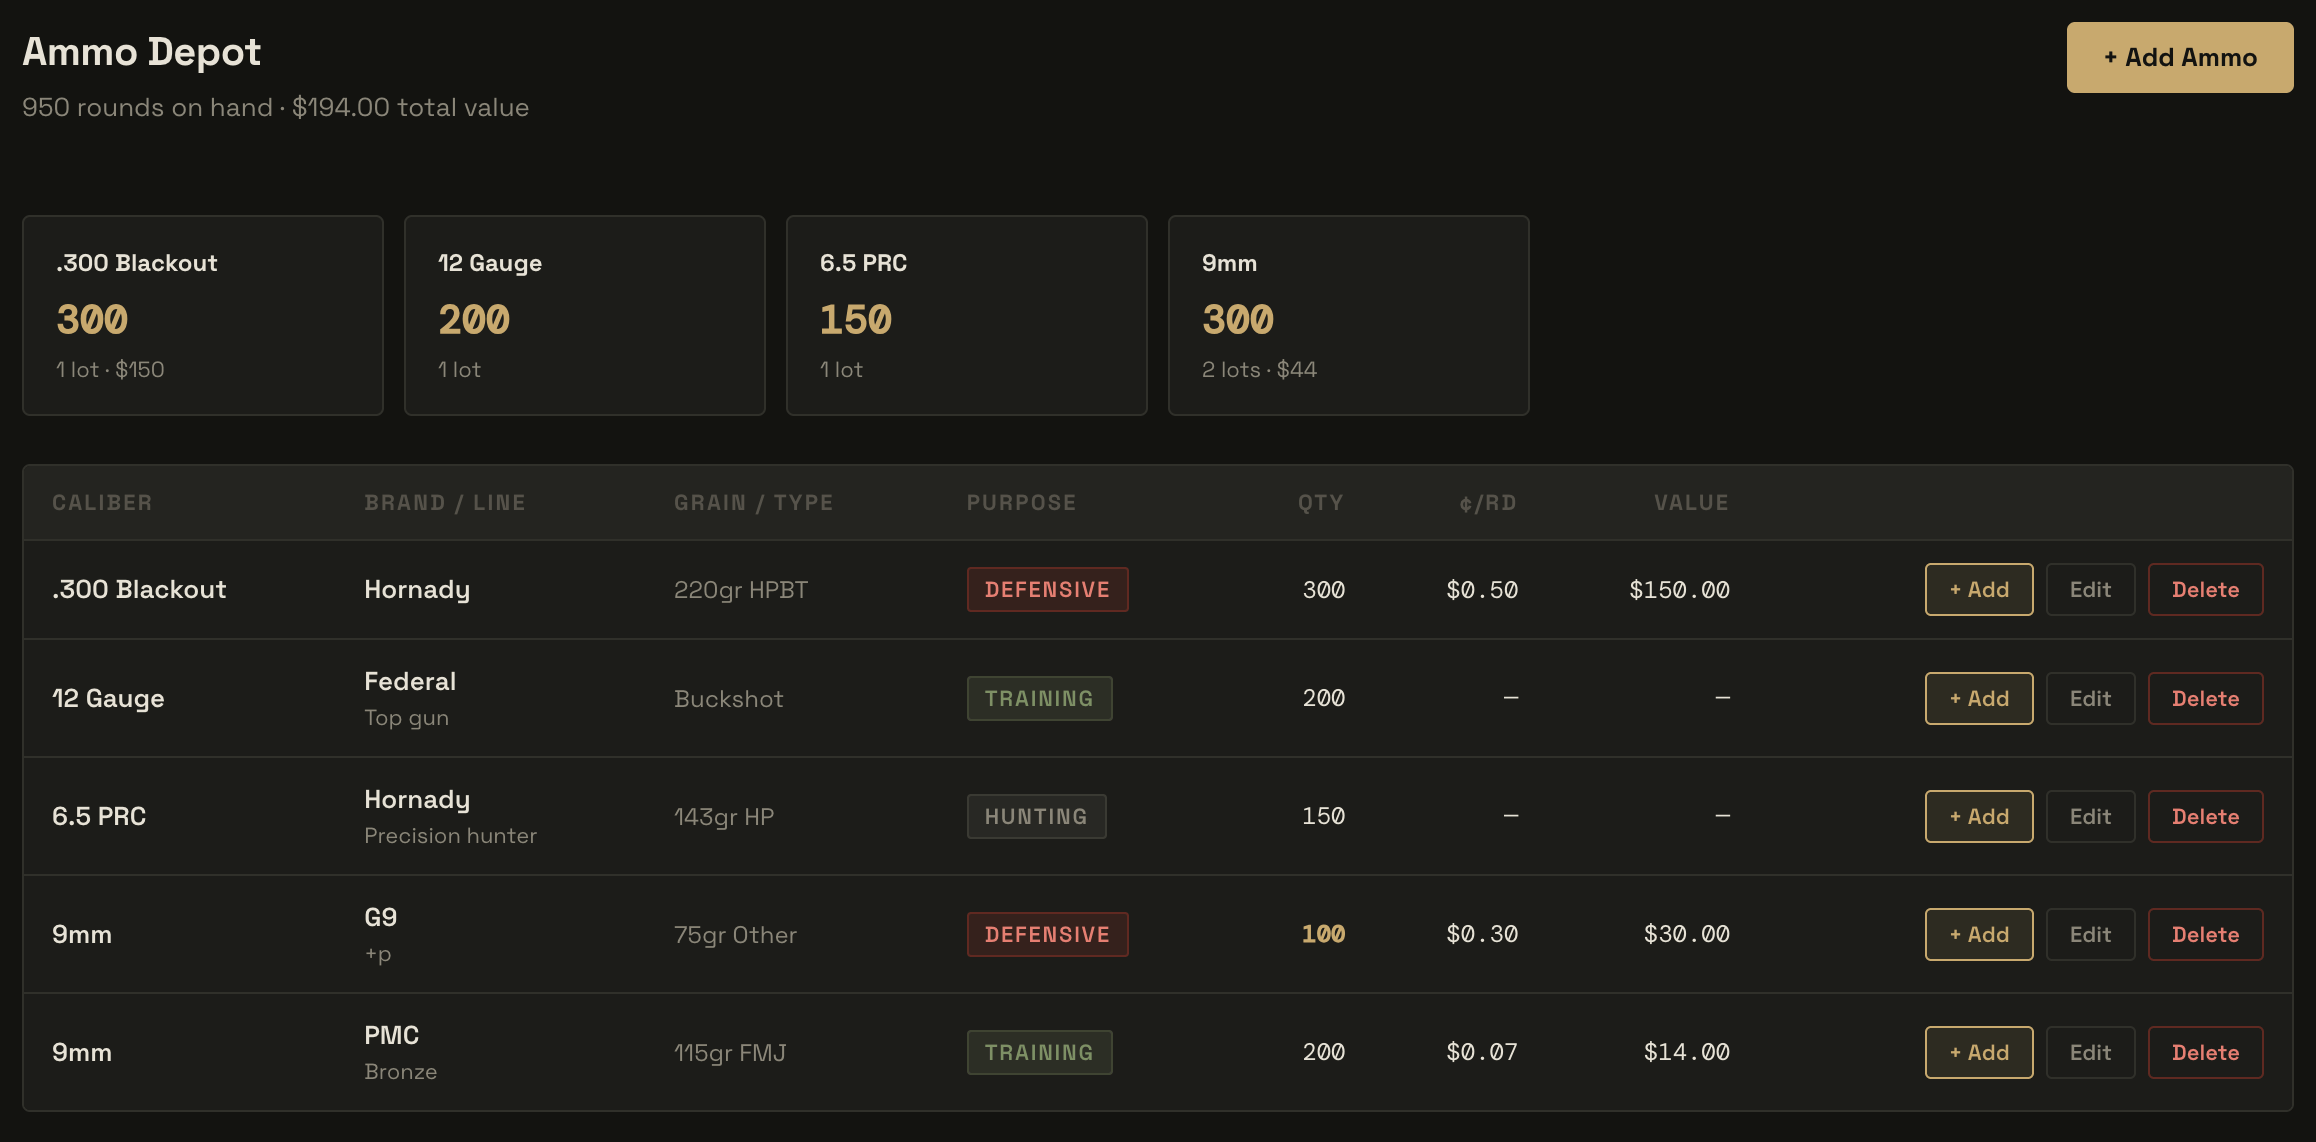
Ammunition main page
Overview
The Ammunition module manages your organization’s ammo inventory and reloading operation. It is split into two tabs: Ammunition for tracking lots of factory and hand-loaded ammo, and Reloading Bench for managing components, recipes, and tools.Ammunition tab
The Ammunition tab lists every lot in inventory. The header shows total rounds on hand and total estimated inventory value across all lots.Adding a factory ammo lot
- Navigate to Ammunition in the left sidebar.
- Click + Add Ammo.
- Leave the Hand Loaded toggle off.
- Select a caliber from the dropdown, or choose Other (custom) and type it in.
- Fill in brand, product line, grain weight, bullet type, casing material, and purpose.
- Enter the quantity (round count), and optionally set a low-stock alert threshold, cost per round, and storage location.
- Optionally assign the lot to a designated firearm, and record the purchase date, lot number, and product URL.
- Save.
Common calibers
The caliber picker includes common options. Enter a free-text caliber for anything not in the list: 9mm · .45 ACP · .40 S&W · .380 ACP · 10mm Auto · .357 Magnum · .357 SIG · .38 Special · .44 Magnum · .22 LR · .22 WMR · .223 Rem / 5.56 NATO · .308 Win / 7.62 NATO · 6.5 Creedmoor · 6.5 Grendel · .300 Blackout · .300 Win Mag · 7.62×39mm · .338 Lapua Magnum · 12 Gauge · 20 Gauge · .410 BoreBullet types
FMJ · JHP · HP · HPBT · SP · JSP · OTM · Frangible · Tracer · Subsonic · Buckshot · Slug · OtherPurpose
Each lot can be tagged with a purpose — Defensive, Training, Competition, Hunting, or Other — which is shown as a color-coded badge in the inventory list.Hand-loaded lots
Toggle Hand Loaded on to log a lot produced from your own reloading bench. In this mode:- The brand and product line fields are replaced with a Reloading Recipe selector that pulls from your Reloading Bench recipes.
- Selecting a recipe auto-populates the caliber and calculates the cost per round from the component costs defined in the recipe.
- A Date Loaded field replaces the purchase date.
Low-stock alerts
Set a Low Stock Alert threshold (round count) on any lot. When inventory falls below that number, the quantity is highlighted amber in the list. When a lot reaches zero rounds it is highlighted red. The default alert threshold if none is set is 100 rounds.Adjusting quantity
Open a lot from the list and click Restock to add rounds, or Adjust to set the quantity directly. Range Day sessions automatically deduct rounds fired from the designated firearm’s linked ammo lot when a drill result is recorded.Designated firearm
Assigning a Designated Firearm to a lot links that ammo to a specific firearm in the Armory. This drives automatic round deduction when range sessions are logged and appears on the firearm’s detail page.Reloading Bench tab
The Reloading Bench is a full sub-module for hand-loaders. It tracks the four component types (projectiles, powder, primers, brass), reloading recipes that combine them into a named load, and the equipment used to load them.Components
Components are the raw materials for hand-loading. Each type has its own inventory section within the Reloading Bench, with sub-tabs for Powder, Projectiles, Primers, and Brass.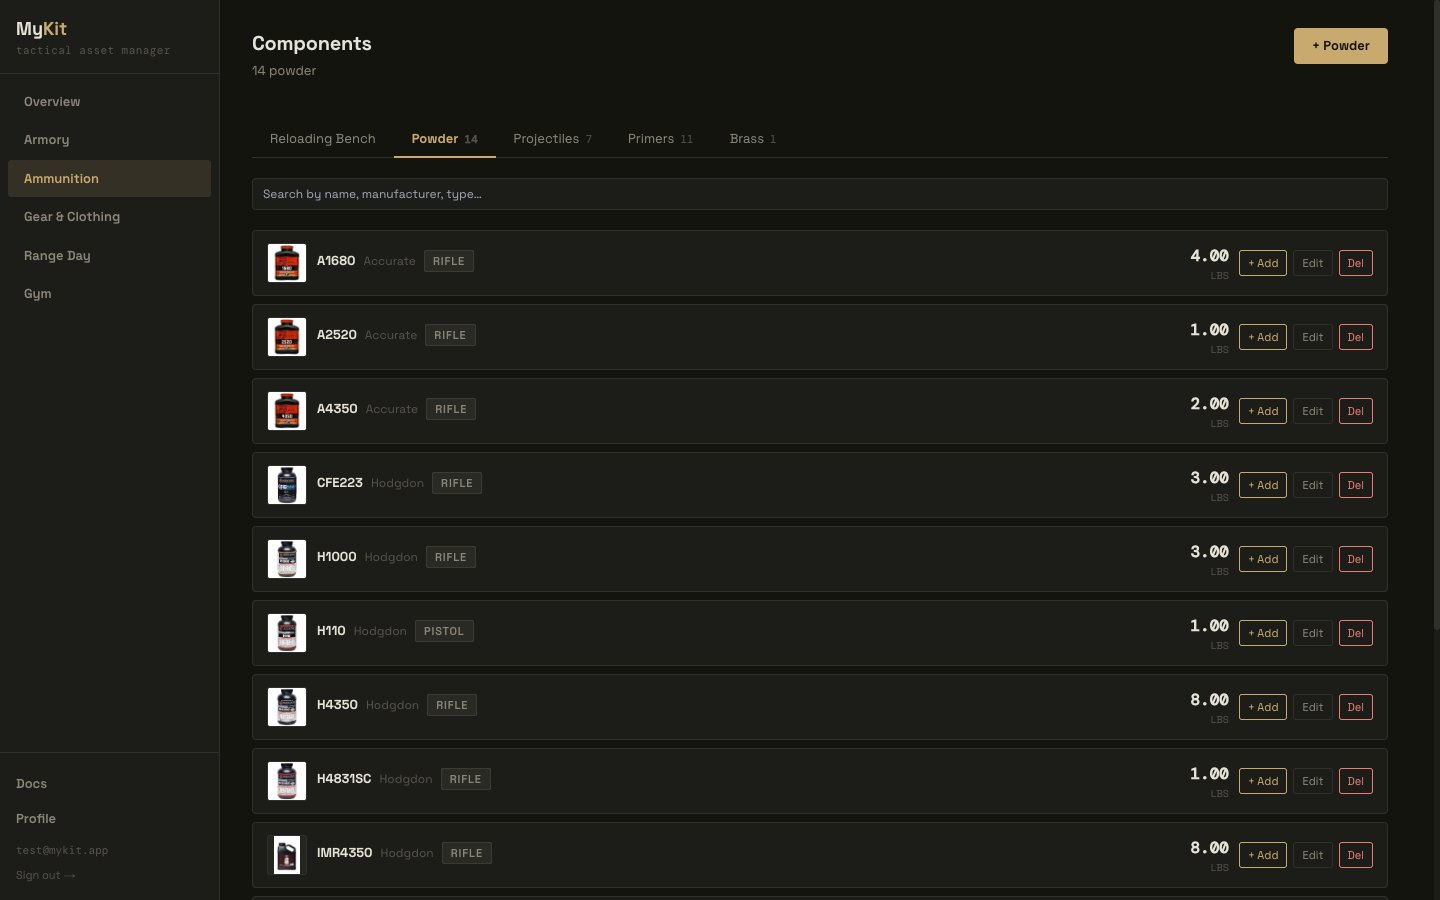
Powder component inventory — one of four component sub-tabs
Projectiles
Powder
Primers
Brass

Brass inventory showing the Identifier label and Times Fired count
Recipes
A recipe defines a complete hand-load by combining components with specific charges and seating dimensions.
A recipe card in the Recipes list
- Name (e.g. “168gr Varget Match Load”)
- Caliber
- Purpose: Match, Hunting, Plinking, Defensive, Subsonic, Other
- Target firearm (optional — links the recipe to a specific Armory firearm)
- Projectile, Powder, Primer, Brass — each selected from your bench inventory
- Powder charge (grains)
- Crimp type: None, Taper, Roll, Factory, Other
- COAL (cartridge overall length, inches)
- CBTO (cartridge base to ogive, inches)
- Seat depth (inches)
- Velocity (fps), SD (fps), ES (fps)
- Accuracy (MOA)
- Pressure signs (free text — e.g. “None”, “Sticky bolt at max charge”)
- Proven load checkbox — mark a recipe as field-validated
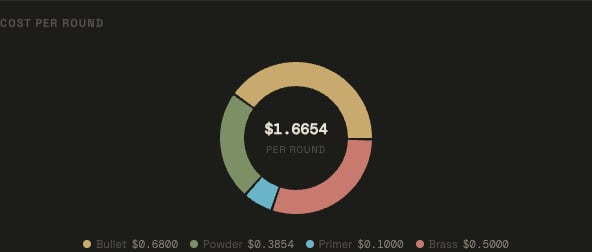
Cost per round donut, broken down by component
Process steps
Recipes support an ordered list of process steps, letting you capture your actual loading procedure alongside the load data itself. Each step has:- Instruction — free text describing the step, e.g. “Trim to length”, “Prime”, “Charge and seat”.
- Tool (optional) — the specific tool from your bench inventory used for the step, e.g. a case trimmer or priming tool.
- Component category (optional) — link the step to a component type (projectile, powder, primer, or brass) when the step operates on that material.
- Metric label + target (optional) — record a measurement to hit at this step, e.g. label “Seat Depth” with target “0.010in”, or label “Powder Charge” with target “46.5gr”.
- Notes (optional) — anything else worth remembering for the step.
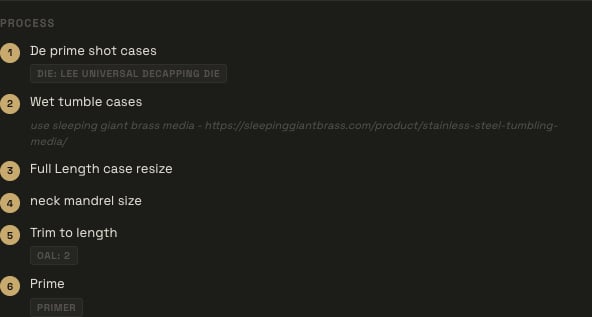
Process steps shown as a repeatable loading checklist on the recipe detail view
Sharing a recipe
Recipes can be shared publicly via a tokenized link — useful for sharing a proven load with other shooters without requiring a MyKit.info account. To share a recipe:- Open the recipe from the Recipes list or its detail drawer.
- Click Share.
- Choose a link expiration — 1 week, 1 month, or never expires.
- Click Generate link and copy the URL.
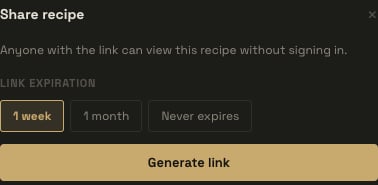
Share recipe dialog with link expiration options
Tools
The Tools section tracks your reloading equipment. Tool categories: Die · Press · Scale · Tumbler · Case Trimmer · Deprimer · Annealer · Calipers · Headspace Gauge · Bullet Comparator · Powder Thrower · Priming Tool · Case Prep · Other Each tool records name, manufacturer, model, caliber (if applicable), condition (New / Good / Used / Needs Service / Retired), purchase price, and notes.
A tool entry in the Tools list