Overview
The Armory module manages your organization’s serialized weapons and everything that goes with them. It is split into four tabs: Firearms, Accessories, Components, and Cleaning. All items are scoped to your organization and visible only to your team.Firearms tab
The Firearms tab is the default view. It lists every firearm in your inventory along with its in-service status, caliber, round count, and any cleaning alerts.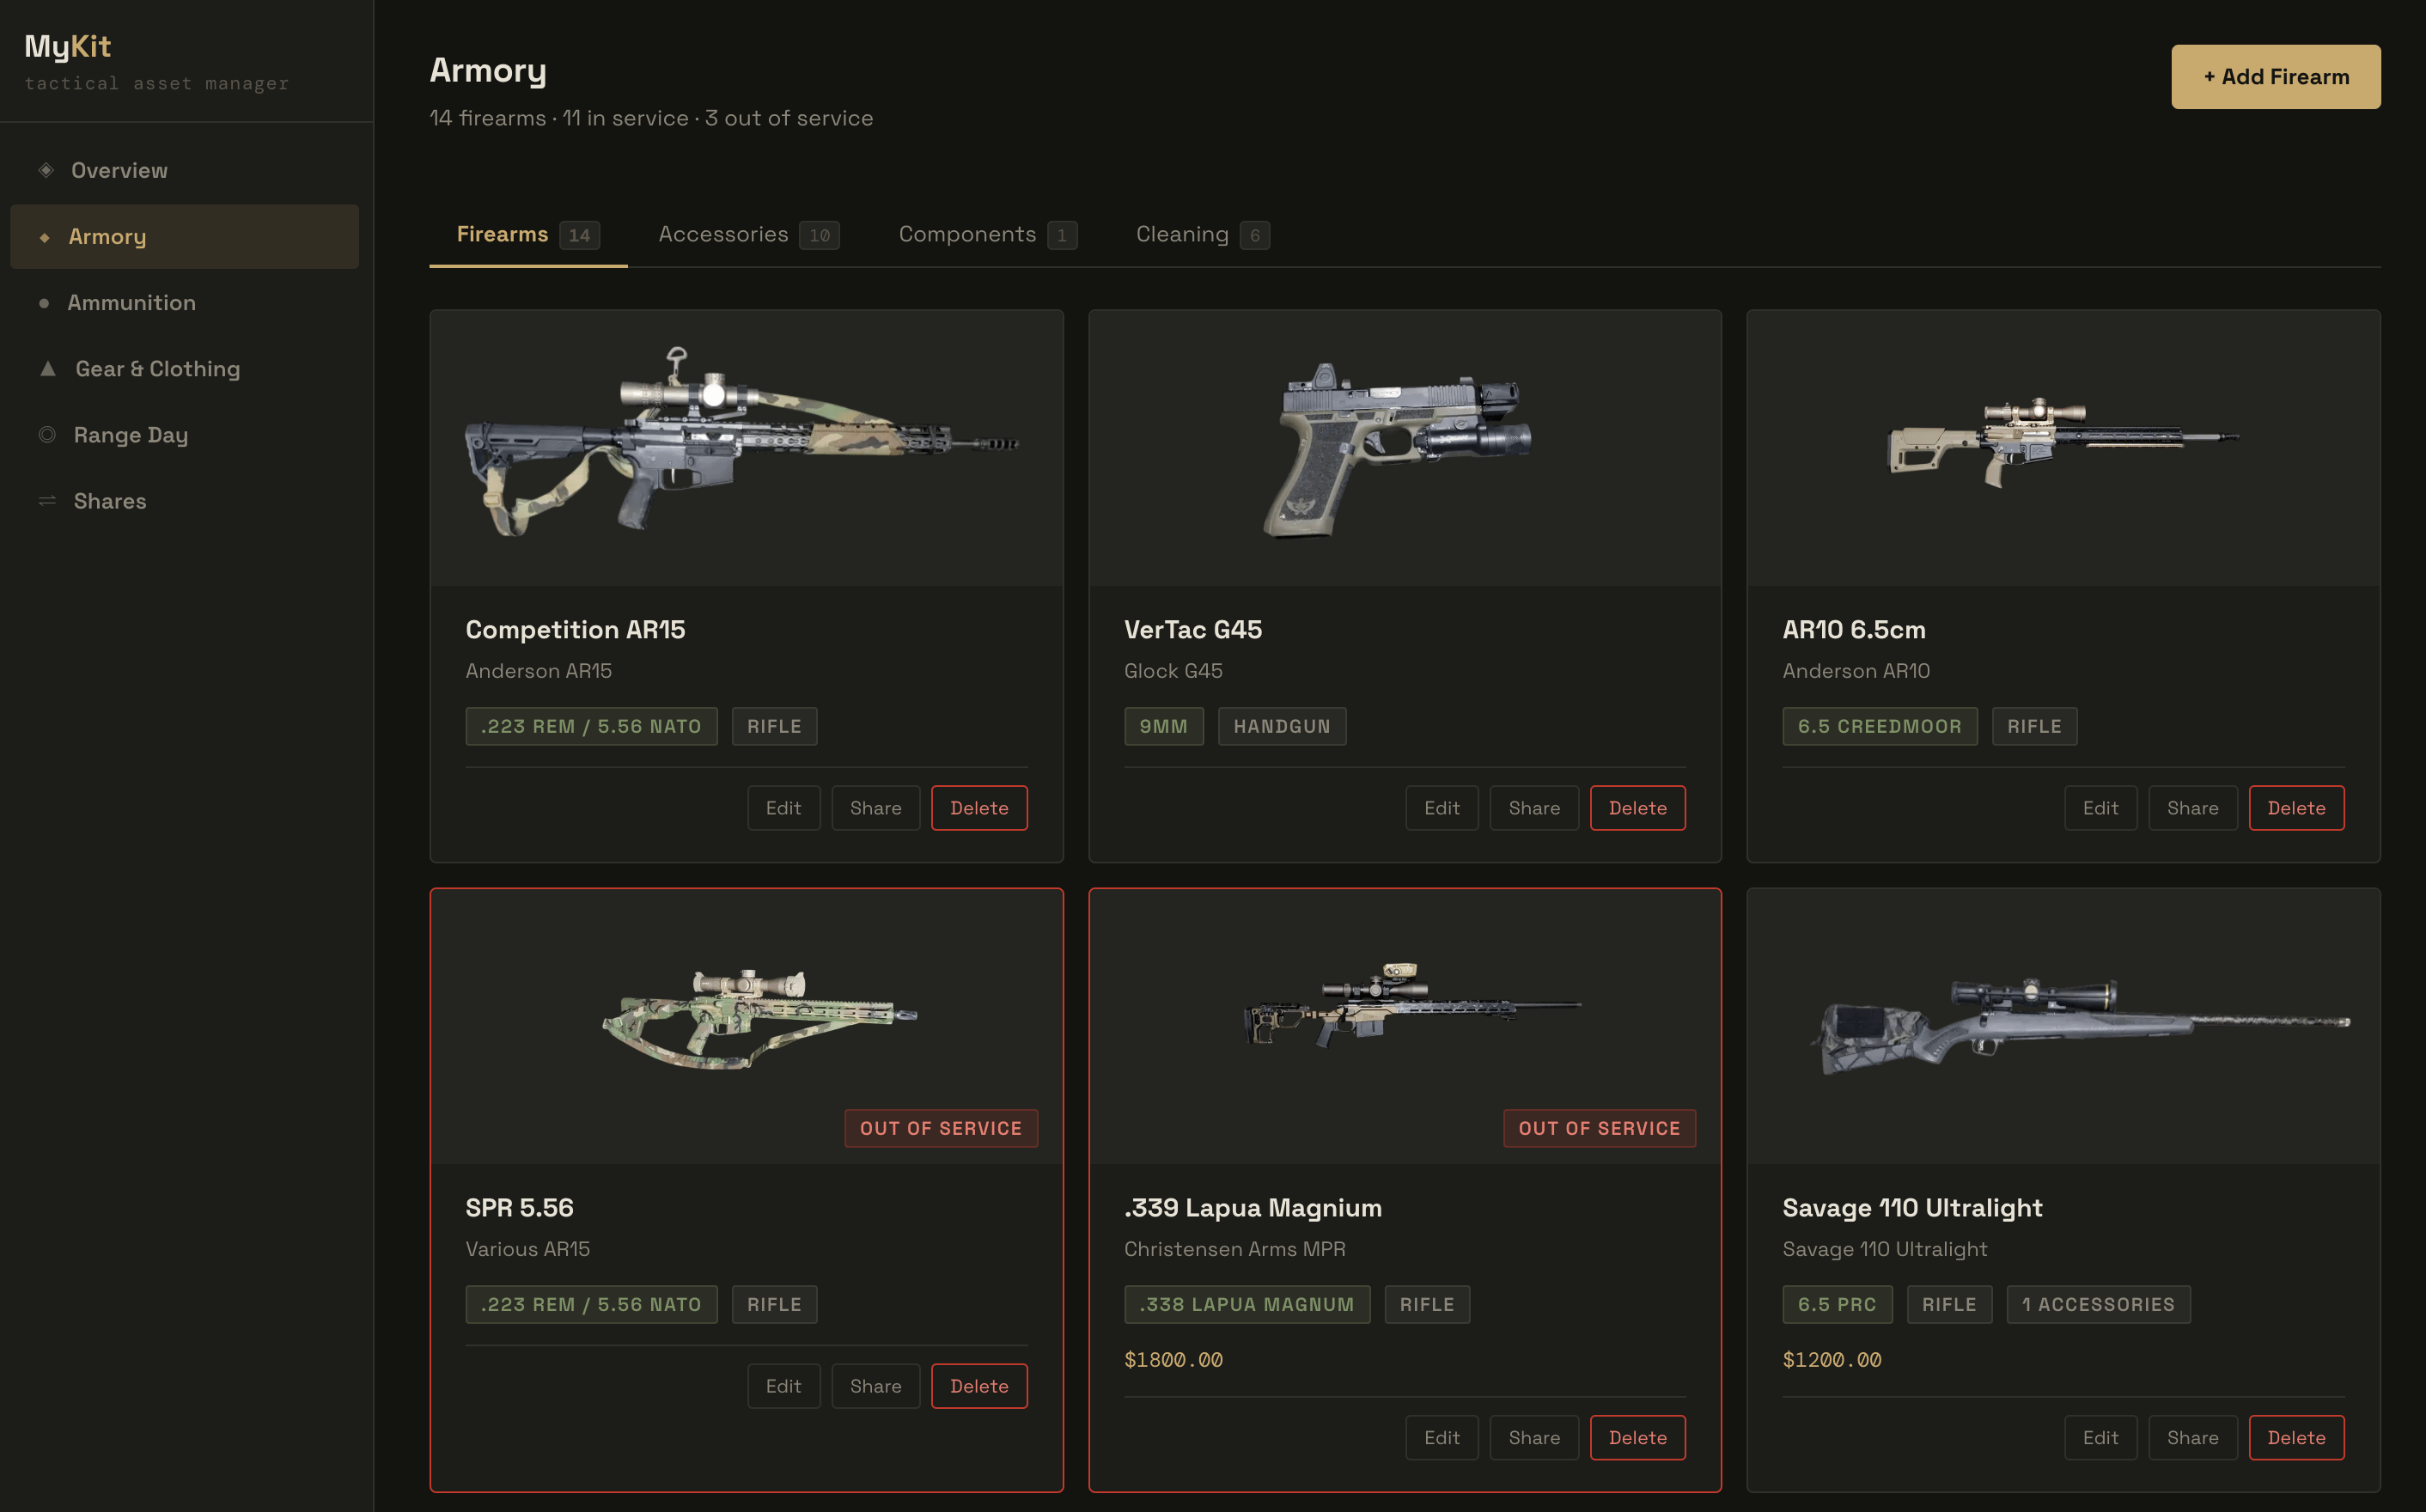
Adding a firearm
- Navigate to Armory in the left sidebar.
- Click + Add Firearm in the upper right.
- Fill in make, model, caliber, and serial number.
- Optionally set a custom name, purchase price, weight, notes, or attach a photo.
- Save — the firearm appears in the Firearms list immediately.
In-service status
Each firearm can be marked In Service or Out of Service. The header subtitle tracks the count of each. Out-of-service firearms remain in the list but are visually distinguished.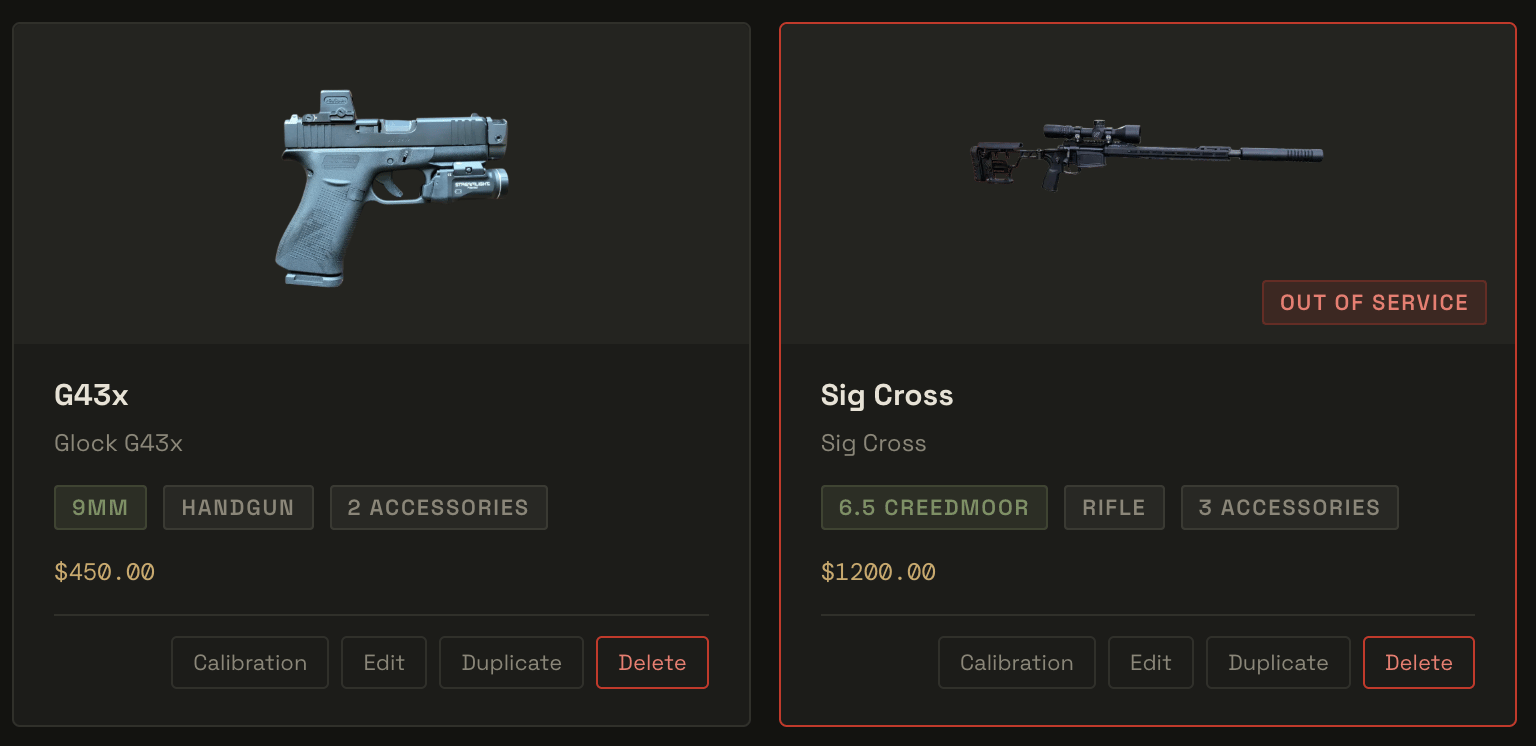
Wish list
Toggle Wish List on a firearm to mark it as a planned purchase rather than owned inventory. Wish-list items display with a dashed blue border and a Wish List badge. Use the wish-list filter at the top of the list to show all items, owned only, or wish-list only.Firearm detail page
Click a firearm card, then click View Details to open the full detail page.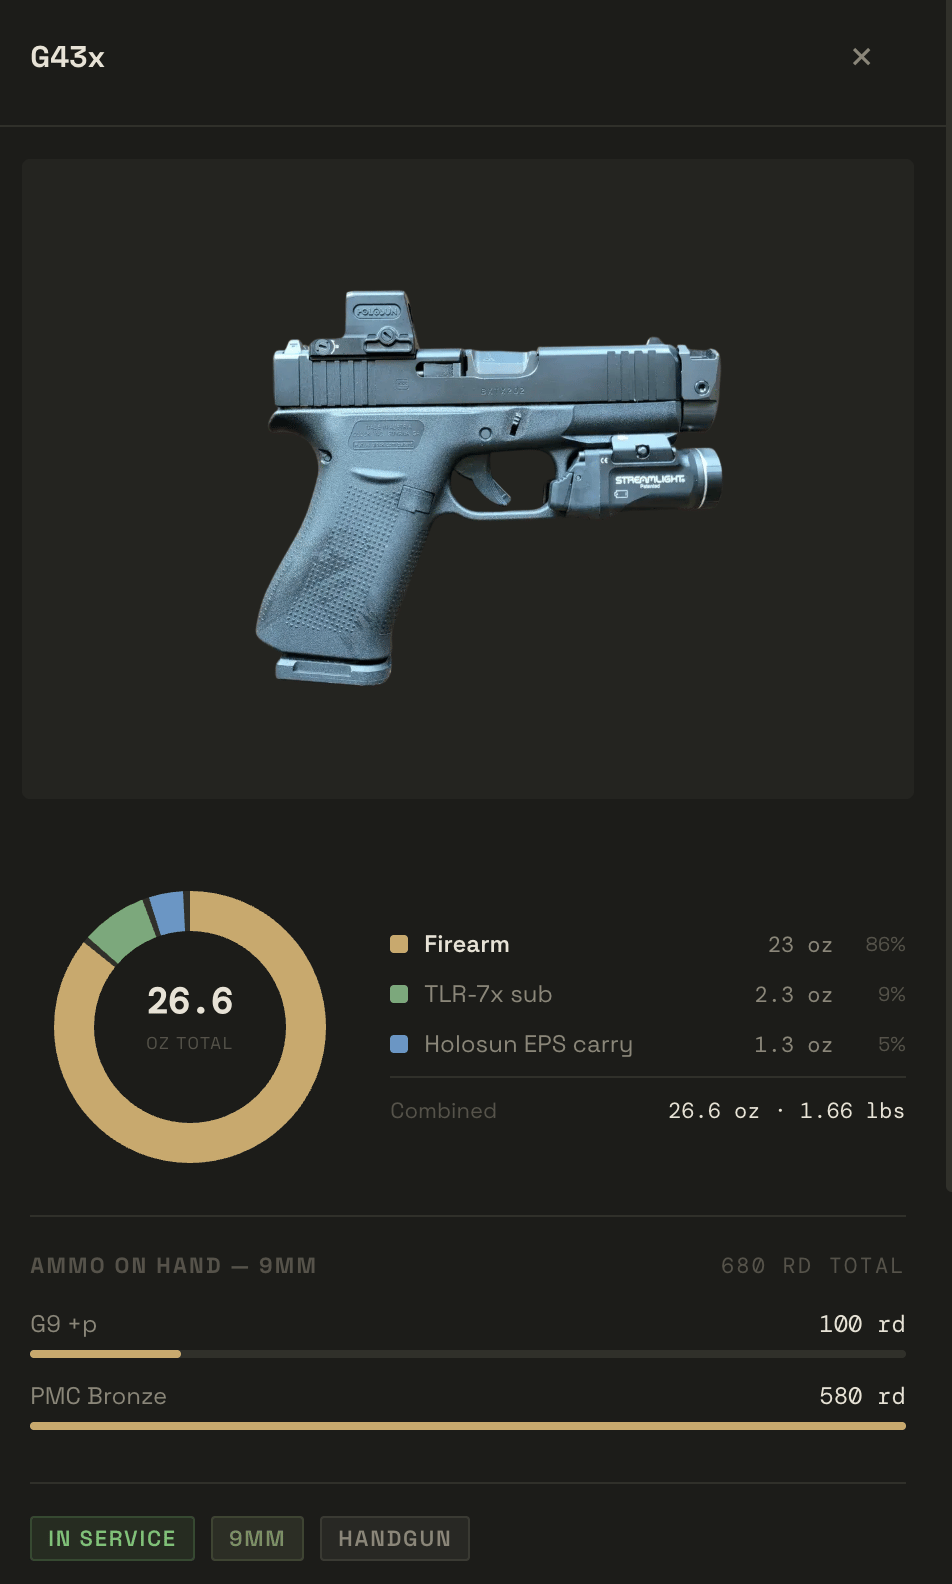
- Photo — the firearm image if one was attached.
- Weight donut chart — total combined weight of the firearm and all attached accessories, broken out by item.
- Ammo on hand — a summary of linked ammo rounds by lot, with round counts.
- Status badges — in-service status, caliber, and firearm type at a glance.

- Cleaning schedule — tracks total rounds fired, the last-cleaned date, the round interval before the next cleaning is due, and how many rounds remain until the firearm is overdue. Use Mark Cleaned from the detail page to reset the counter after a cleaning session.
- Attached accessories — all accessories currently assigned to this firearm, listed by type and name.
- Installed components — components toggled as installed on this firearm.
- Watch calibration — if a Garmin watch is paired, this section lets you calibrate shot detection thresholds against this specific firearm. See Watch Calibration for the full workflow.
Accessories tab
Accessories are tracked as standalone items and can optionally be assigned to a specific firearm.
Adding an accessory
- Go to Armory → Accessories tab.
- Click + Add Accessory.
- Select a Type — if you choose Optic, additional fields appear (see below).
- Optionally assign the accessory to a firearm.
- Enter name, brand, serial number, product URL, purchase price, and weight.
- Save.
Optic-specific fields
When Type is set to Optic, an Optic Details section appears with:| Field | When shown | Options |
|---|---|---|
| Optic Type | Always | Red Dot, Magnified Optic |
| Adjustment Unit | Always | MOA, MRAD (Mil) |
| Focal Plane | Magnified only | First Focal Plane (FFP), Second Focal Plane (SFP) |
| Magnification | Magnified only | Free text, e.g. 1-6x |
| Reticle | Always | Free text, e.g. BDC, MRAD Grid |
Wish list
Same as firearms — toggle Wish List to mark an accessory as a planned purchase. Wish-list items show with a dashed blue border and are filterable from the filter bar.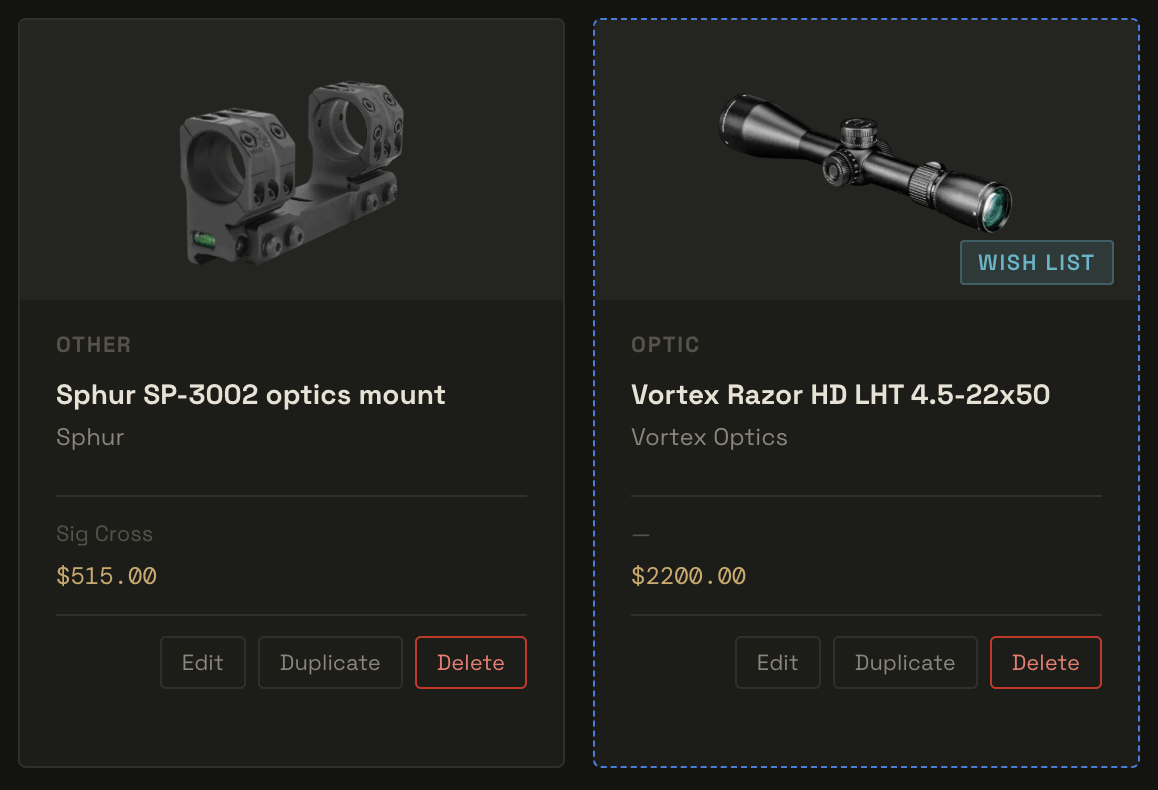
Components tab
The Components tab tracks internal parts and upgrade components — things like barrels, trigger groups, bolt carrier groups, and springs.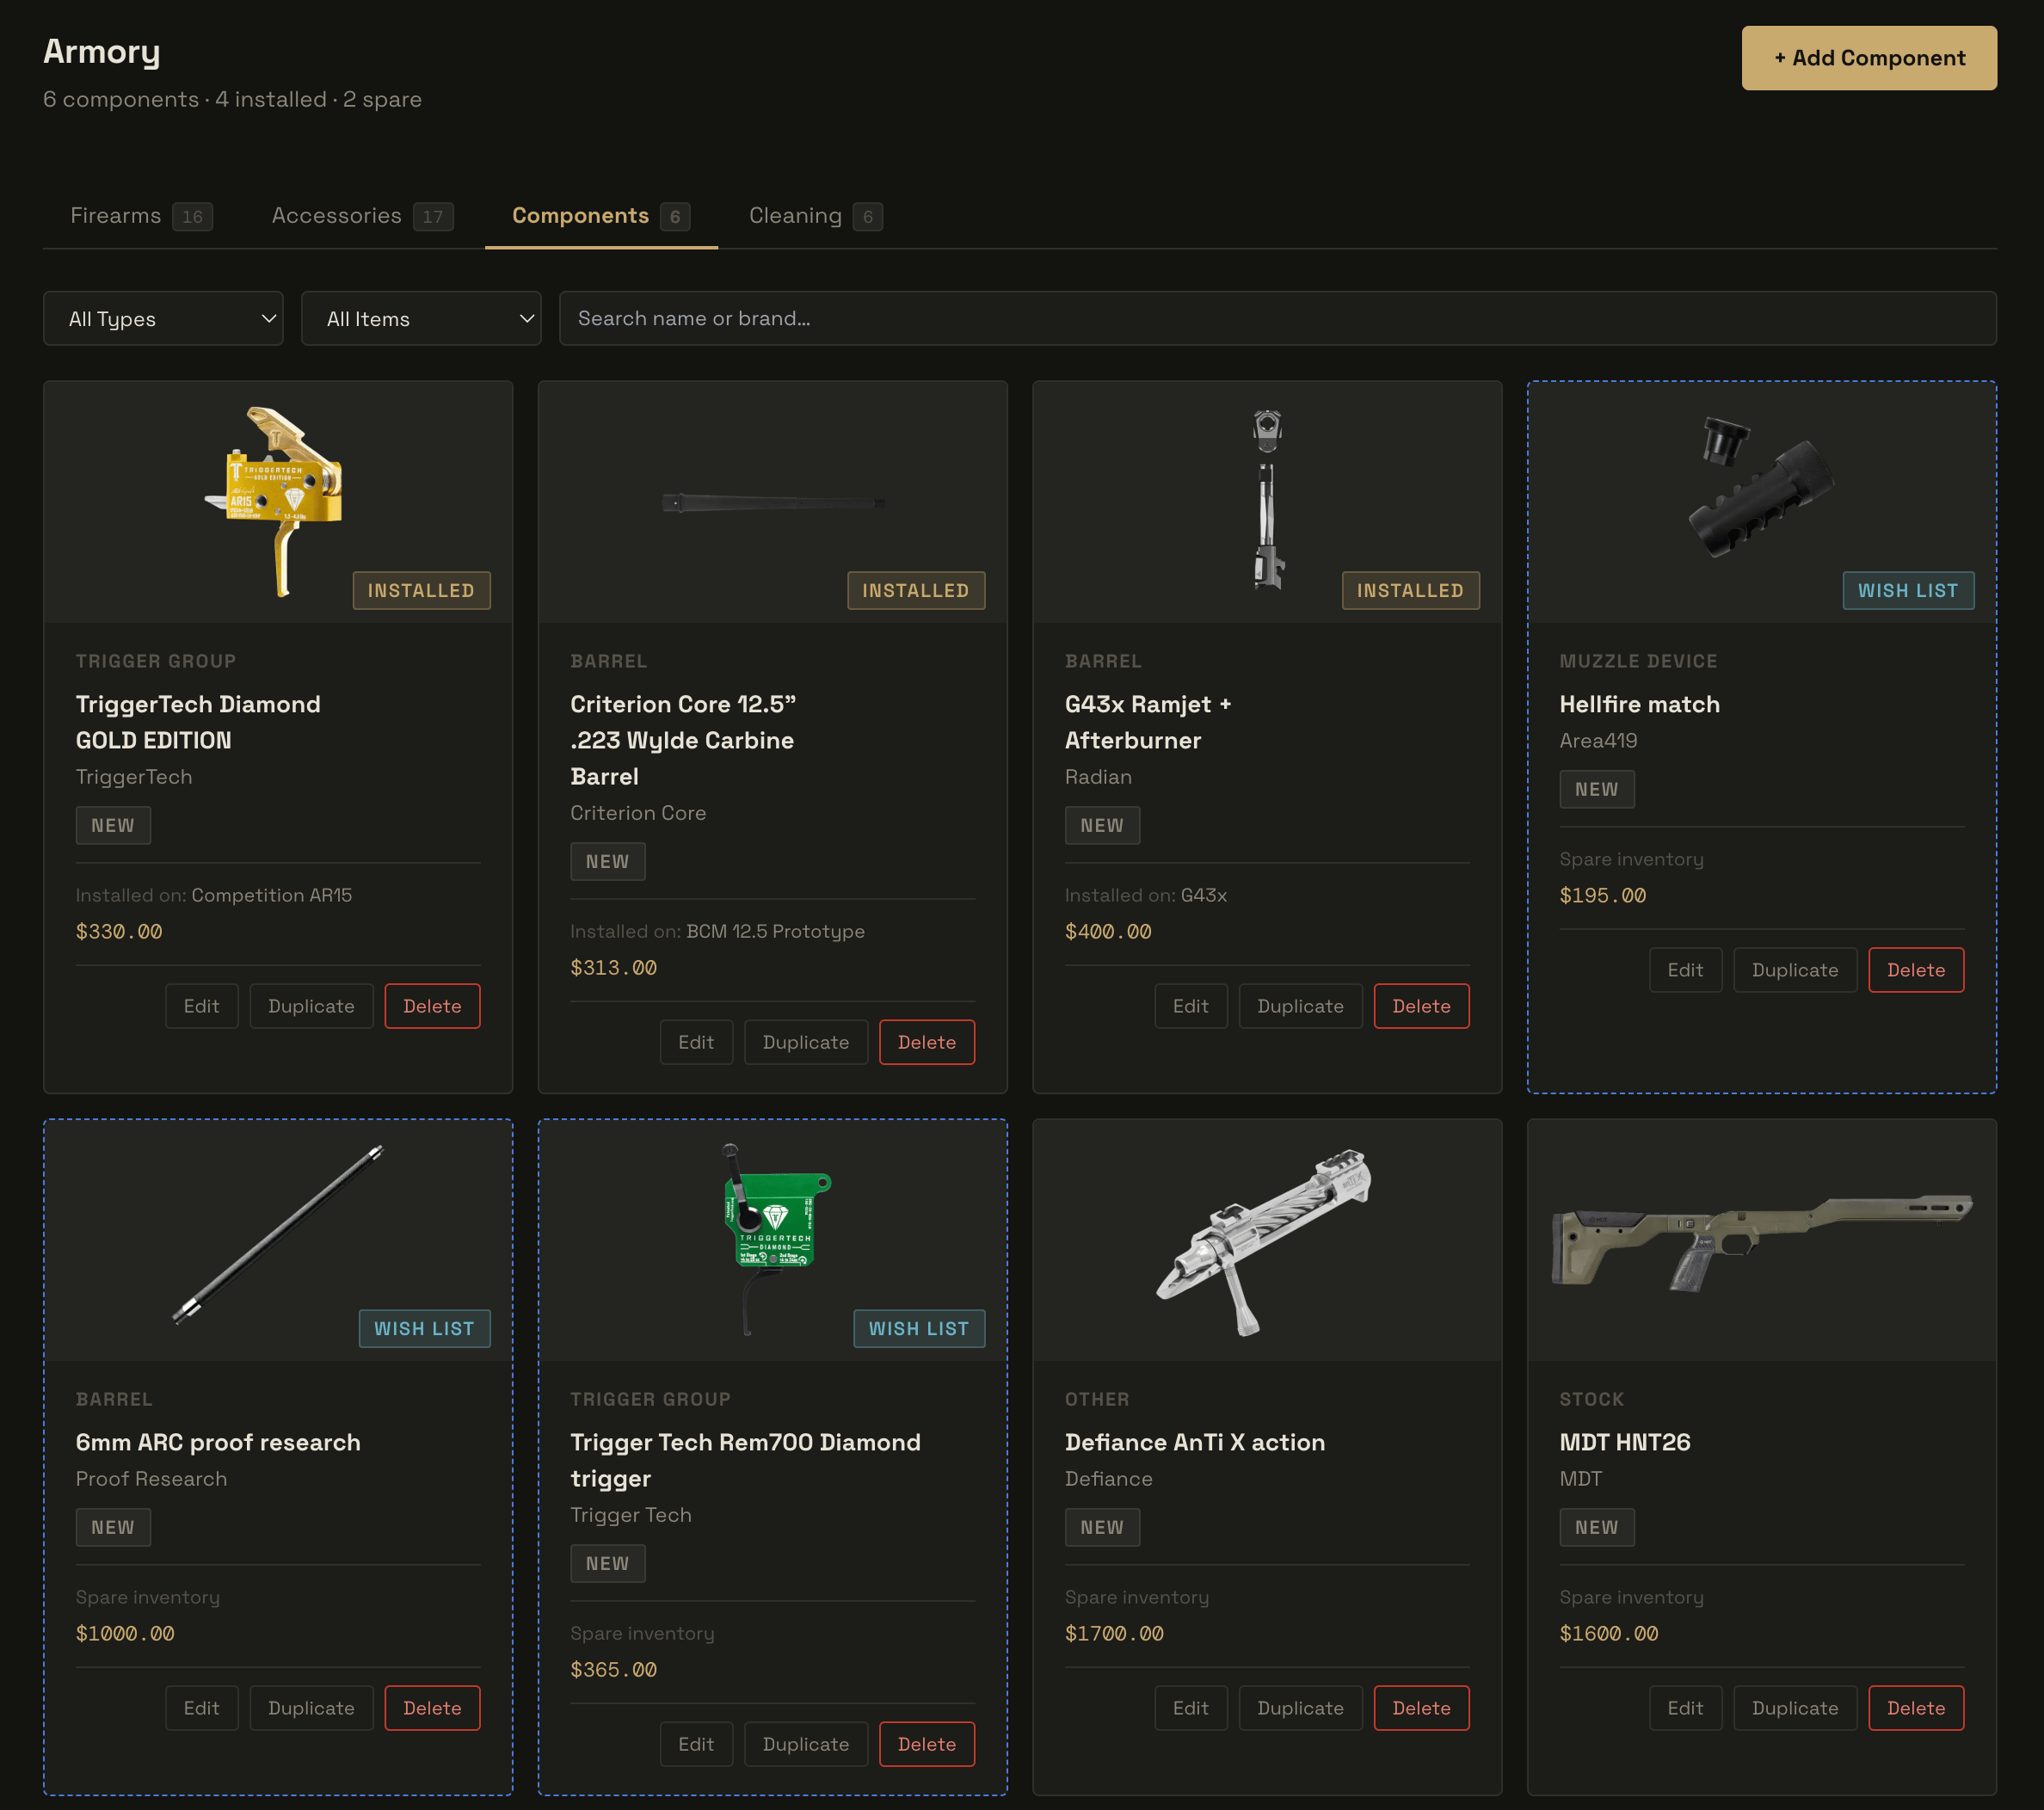
Adding a component
- Go to Armory → Components tab.
- Click + Add Component.
- Select a type, condition (New / Used / Refurbished), and optionally assign it to a firearm.
- Toggle Installed if the component is currently on the firearm; leave it off if it is spare inventory.
- Enter name, brand, serial number, purchase price, weight, and any notes.
- Save.
Installed vs. spare
- Installed — component is currently on an assigned firearm. Shown with a gold Installed badge.
- Spare — component is in inventory, not currently mounted. Shown as “Spare inventory” in the card footer.
Wish list
Toggle Wish List to mark a component as a planned purchase. Filtering works the same as on the other tabs.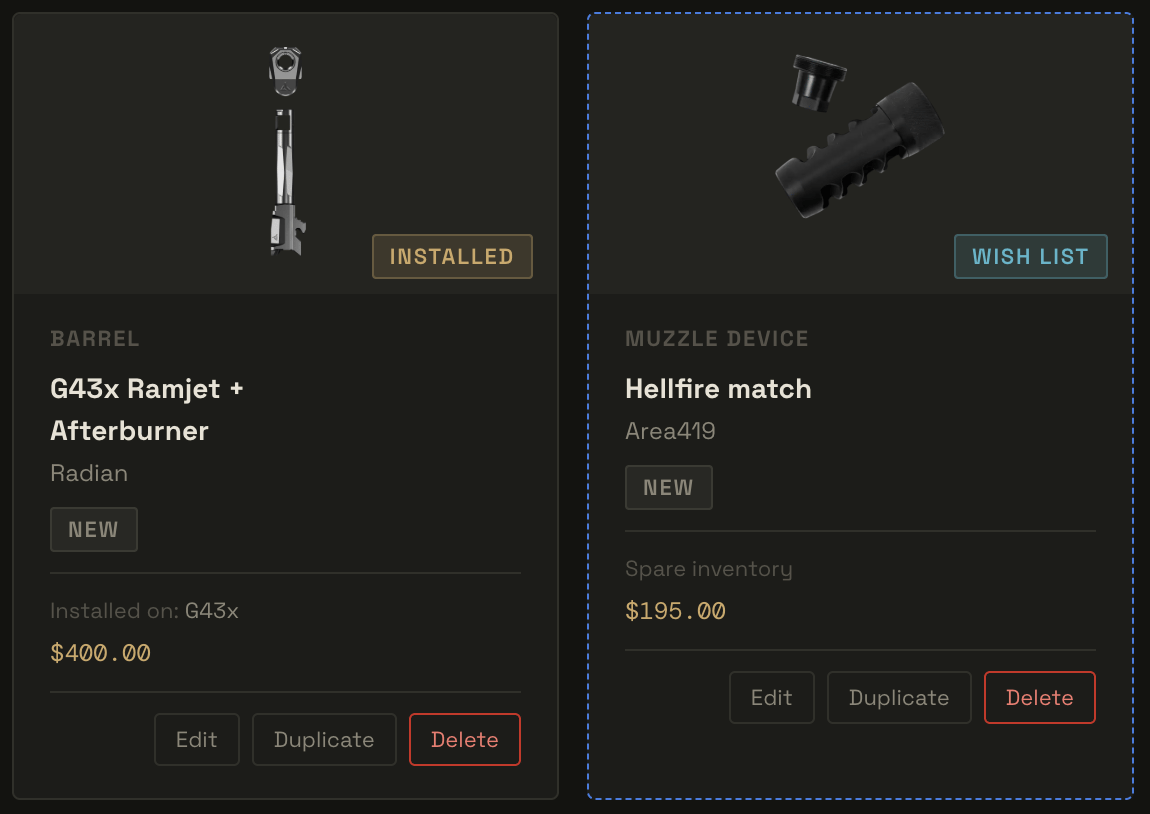
Cleaning tab
The Cleaning tab is split into two sections: Cleaning Procedures and Cleaning Supplies.Cleaning supplies
Supplies tracks your physical cleaning products. Supply types include: Solvent / CLP · Lubricant / Oil · Patches · Bore Brush · Cleaning Rod · Bore Snake · Cleaning Cloth · Pick / Tool · Other Add a supply with + Add Supply. Each supply stores a name, brand, type, quantity, and optional notes.Cleaning procedures
Procedures are step-by-step cleaning routines. Each procedure can be linked to a specific firearm and contains an ordered list of steps with notes.- + New Procedure to create a routine.
- Click a procedure card to view the full step list.
- Use the Print button on the detail page to open a printer-friendly version suitable for posting at a cleaning station.
Cleaning alerts
The Armory tracks rounds fired per firearm and surfaces a cleaning alert when a firearm is overdue based on its assigned procedure’s round interval. The alert appears on the firearm card and the firearm detail page. Use Mark Cleaned from the firearm card or detail page to reset the counter.Filtering and search
All four tabs share the same filter bar pattern:- Type filter — narrow by type (caliber on firearms, accessory/component type on their respective tabs, supply type on cleaning).
- Wish list filter — show All, Owned only, or Wish List only.
- Search — full-text search on name and brand fields.